Monday, 9 May 2016

CII. The Automaton

Another Iron Painter entry from me: The Automaton.


The robot is based on this illustration for a Magic:The Gathering card:

Proteus Machine. Artwork by Greg Staples. © Wizards of the Coast
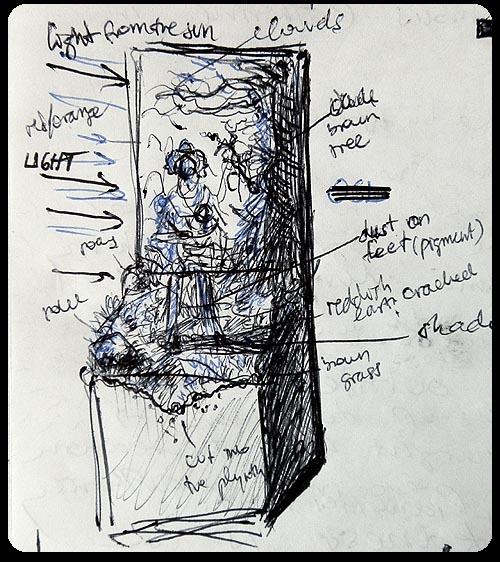
I wanted to make a clockwork automaton like that one for Gardens at some point. As a mercenary or even a part of a whole new faction. I made a skech and notes for later. 


But round 3 of Iron Painter had a theme in which such a miniature would fit, so I used the opportunity. But I had to turn the idea into something a bit more elaborate than a gaming piece. Not that I cannot still use him for games; it would not be too complicated to make him removable from the large base to a 30mm round one.

Sketch of the composition.
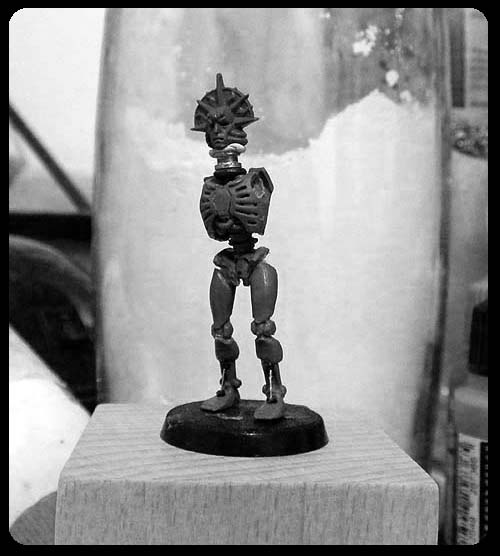
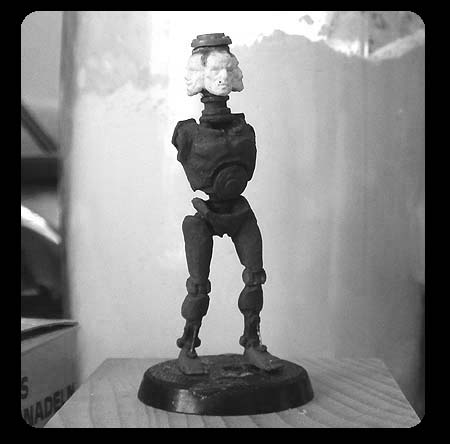
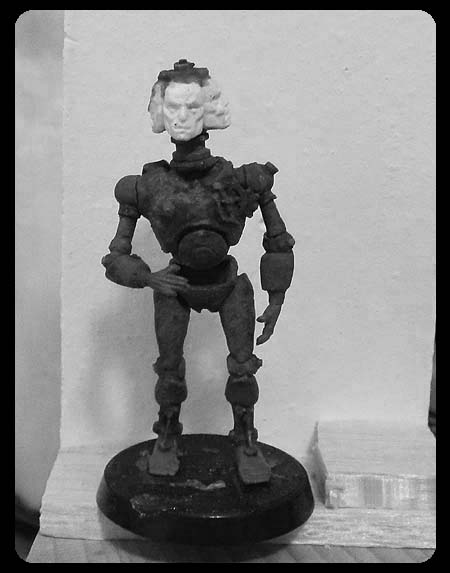
The robot started as a Necron Warrior.
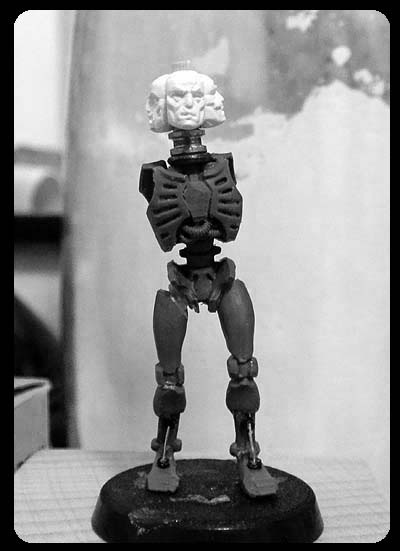
The faces are 40K Blood Angel masks. I made copies rather than cutting the actual bits.
Originally I meant to make the head actually rotateable. However, since I later decided that I want dramatic lighting coming from one side of the scene, this idea didn't seem right any more. I ended up gluing it in place.
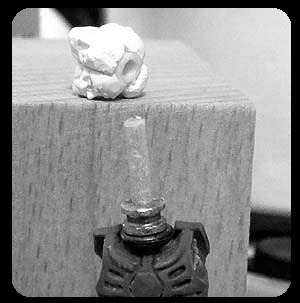
The torso needed some sculpting.
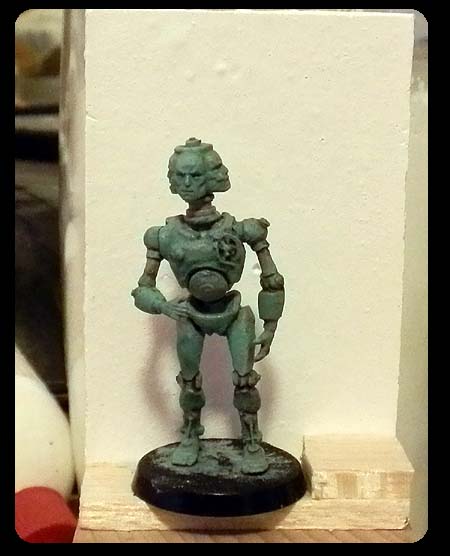
The finished conversion.
Once again I relied a lot on washes and glazes when painting the miniature.
The base was simpler than the last one. I used air-drying clay, plaster and real tree roots.
 

The feel I was hoping I would get was that of an old-school SF illustration. I think I did that part right. But there is just something missing. The scene seems to me too static, too dull. Do you have the same feeling? How would you fix it? It's too late now to improve it for the competition, but at least I can learn for next time.

Saturday, 23 April 2016

CI. The Wilderness Project vol.2

While waiting for the next round of Iron Painter to be announced I've added a few more pieces to my Wildreness terrain collection.  

The well.


It was built stone by stone. The material is polystyrene, which I cut to small bits and then pressed against gravel to give them a rocky texture and shape. I glued them with PVA. This well and the wall you'll see below are my first attempts at miniature dry stone structures. I'm very happy with the result.
When the structure was built and the glue dried completely, I gave it a coat of plaster + PVA. After that it was just texturing the base and it was ready for painting.

 *
 
Dry stone wall.
The building technique was the same, except that the wall has a balsa wood core.
Ready for painting.

Another shot of the finished product. I plan to make several more wall sections, including one with a gate.
*
I finished another Citadel Wood. This means I have 3 large and 4 small tree scenery pieces. No more Citadel kits to build, but I have an unopened Hanging Trees box from Wyrd. That will do for 2 or 3 more small ones.
*   *   *

Speaking of forests, I visited one recently. Great both for recreation and for harvesting useful ingredients. I brought home some roots for use on future projects.

Thursday, 14 April 2016

C. The Door to the Paths of the Dead

"The way is shut. It was made by those who are Dead, and the Dead keep it, until the time comes. The way is shut."
- J.R.R. Tolkien, The Lord of the Rings: The Return of the King.


Three of my clubmates and I entered Wyrd's Iron Painter competition this year, and the above vignette is my entry for the second round. I don't normally do display pieces, so this was an interesting exercise. I built the entire base from scratch, I painted it using almost exclusively washes and glazes over a white undercoat (I just painted on a few highlights at the end to finish it off). Bright colours, as well, are not what I usually put on my miniatures. But this really works. All in all I am very happy with the result and I learnt a lot in the process. Hope it fares well; my opponent is a tough one.

I took some pictures as I worked:
The building began with rough shapes. The wall was cast in plaster, the stairs are balsa wood and the rocks polystyrene. A large undead knight was originally meant to stand on the base, but in the end I changed my mind and went with the ghost miniature.
I had most fun making the door. It started from balsa, cut into shape and textured to resemble wood.
The metalwork is plasticard and pins.

The trees that flank the door are part wood, part air-drying clay.

The modelling part is finished.

I had fun painting with washes and thin glazes. This is what it looked like after the first couple of layers.

More washing and glazing.

The state of the base before I started work on the miniature. Later, when the miniature was in place, the lower steps felt too empty. So I added some bones. They also gave a darker tone to the piece.

The miniature is a simple one. It's one of the Spirit Host ghosts, with a Bretonnian knight's face and a crown. I added the 'hairs' made of thin wire and static grass, each glued in place individually. It took a while... but it was worth it.

The King of the Dead was in a way inspired by this Ian Miller piece:


And the base is an adaptation of the background from this painting by Petar Meseldžija:


Next round of Iron Painter won't start until April 25th, so I'll have some time now to work on the next update of  the Wilderness terrain project.

Tuesday, 22 March 2016

XCIX. The Wilderness Project vol.1

The Cemetery Project is on hold for the time being as I got tired of it. Will continue when inspiration returns. In the meantime I took up another terrain project. Back when I started thinking about building scenery I listed several environment types, and for each of them which terrain they might contain. Like this:

WOODS
  • trees
  • woods
  • rocks
  • mushroom ring
  • shrine of St. Hubertus
  • uprooted tree
FIELDS
  • rocks
  • trees
  • fences
  • windmill
  • ruined cottage
  • rotting wagon with supplies
  • mud

Since these two environments share a good number of terrain pieces - rocks, trees... for the building project I combined them into a single category I named Wilderness. Plenty has been done, although some of it was just some extra work on pieces you might have already seen on the blog.
Once again I found inspiration in Diablo III, where I observed the Fields of Misery area and its features. I gathered up a folder of reference photos, too. The overall tone of the Wilderness environments differs from the Cemetery; the colour scheme is much warmer thanks to the use of dry yellow static grass and brown soil. I used two shades of Field Grass from Noch, as well as three types of Gamer's Grass tufts in order to prevent an overly monotonous look. 

*   *   *

Forests and trees.

A Citadel tree on a scratchbuilt larger base. The base is polystyrene built up on MDF.

The reverse of the same piece, to show the magpie I put on the tree's portruding root.

This is a combination of Wyrd and Citadel trees.

A Citadel Wood tree on an extended base.


A tree from Wyrd. An older piece, but now I've redecorated its base to match the new idea.

A forest area terrain. Another one just like it is on its way.


This terrain has been through a number of transformations in its lifetime.


*

Rocks. My process for making these includes use of polystyrene, papier-mâché and plaster.

Rocky outcrop I.

Rocky outcrop II.

Rocky outcrop III.
*

Special features. This group is comprised of pieces that are landmarks and/or annomalies in the wilderness. When used for gaming they will serve as objectives or as terrain with special rules.

The Arch. There is something odd about it, and people tend to avoid it. It's a resin kit from Origen Art.

The Standing Stone. This piece was my brother's idea: a standing stone that looks gravity-defying and uncanny. Also, it does have a habit of moving around when no one is looking. My addition to the concept was a subtle face. I carved it into a small piece of plaster and blended it with the polystyrene rock.

Fairy Ring. Folklore warns against touching the mushrooms that form the circle, and entering the ring is regarded as even more perilous. They say it can transport tresspassers to the cruel land of the Fae. 
  
 *

As you can see from the group shot, the set is shaping up nicely. I'm planning to do another area forest and another one or two lonely trees. A water well and some stone field fences might be a good idea, too. And I could really use a proper, textured and flocked gaming board...

Thursday, 3 March 2016

XCVIII. Heraldry and Museums

Some notes on heraldry in my world. You'll find them similar to European heraldic laws and customs, but there are some visible differences. For instance, I decided to omit the rule concerning tinctures that would, for instance, not allow a yellow device to stand on a white field. I am aware this was introduced for practical reasons of visibility from a distance, but I found it limiting. Another thing was that I keep the  design on the shield simple, expelling the heraldic bestiary to the crest. This was inspired by the elegance of samurai heraldry...    

*

A coat of arms consists of the colours and the crest. 
The colours are displayed on a shield or banner. Consists of one or more fields with charges placed on top. Charges are simple designs, normally geometric shapes. Most common are molets (stars), losenges (diamonds), roundels (discs), stylized flowers (trefoil, quatrefoil, cinquefoil... named after the number of petals), crescents; bars - fess (horisontal), bend (diagonal), chevron (v-shaped), cross... Every field and design has its tincture. The heraldic tinctures are: Gules (red), Sable (black), Azure (blue), Vert (green), Or (gold/yellow), Argent (silver/white). In the Monarchy the most commonly found heraldic tinctures are red, black and white, while blue is the rarest. 
The crest is displayed above the colours. A crest is a more complex image: an animal, a legendary creature, a person, a body part, an object, a plant... Or more than one of them. The colour of the crest is not heraldically significant - meaning that when describing a coat of arms the tincture of the crest is generally not specified.

I painted some coats of arms in colour as examples.


As to who can bear a coat of arms - it's noble families and their members, countries, cities and towns, highest ranks of the clergy...
In rural communities there is a practice of using house-marks. Those are rune-like glyphs used by peasants to mark property. A family will carve their house-mark on their house and their tools. They will brand their cattle with their mark. Unlike with heraldry there are no tinctures and no crests; house-marks tend to consist of lines, which makes them easy to carve or scratch into wood and stone. 

*   *   *

I made a trip to Sofia recently. Just like the previous two times I was in Bulgaria's capital, it was rainy and uncomfortably cold outdoors - so I went to a couple of museums instead of rambling through the streets. Hopefully the next time I go there the weather will be more fit for sightseeing.

Етнографски музей в София, Ethnographic Museum in Sofia. The museum is rather tiny, but I was happy to have been able to see Bulgarian carnival masks in person. Some of their collection of Kuker costumes was on display, and an exhibition about the Surva Festival of Pernik was on when I visited. The Surva Festival is a big three-day event that gathers masses of Kukeri from all over the country. Must be quite a sight. Bulgarian Kukeri are mummers akin to Zvončari and other carnival bell-ringers of Croatia and many more lands across Europe (I wrote a bit about them back in 2013).    


Mummer's mask, Mogila village, '90s of the 20th century.

Mummer's mask, Pobeda village, '80s of the 20th century.

Mummer's costume, Veselinovo village, '90s of the 20th century.

Kuker costume from the Surva exhibition.

Kuker mask from the Surva exhibition. Those teeth are creepy.

Bear costume from the Surva exhibition.

*

I've also been to the Национален природонаучен музей - National Museum of Natural History in Sofia. It spans across four floors, and includes collections of ancient fossils and diverse minerals; rooms with glass cases and dioramas of stuffed animals and birds; shelves of pickled frogs and lizards; hundreds upon hundreds of dragonflies, horseflies, butterflies and gnats - all stuck on pins and lined up in an orderly fashion, with name tags and all... The usual stuff for a place of this kind. I rather like natural history museums, especially the entomological sections. I took some photos of the exhibits, but since they are all behind glass the results were kind of lousy. I'll just show a few:    

Human skeleton. What I found interesting here are the metal bits that keep it together. It's something I would like to see on a reanimated skeleton - a necromancer giving extra reinforcement to his undead puppet.
The rib cage.
Flying lizards.
One of my favourite exhibits in the whole museum: a heavily armoured white crab of the Parthenope genus. A giant version of it would make a fine monster.