Monday 30 March 2015

LXXXIII. The Cemetery Project vol.3

Done a bit of painting last week and now two of my mausoleums are finished. Unfortunately, I haven't got any work-in-progress pictures of this because my only camera was away on a business trip the entire week. However, I have one last unpainted mausoleum, so I still have a chance to do a step-by-step tutorial.


In order to get colour scheme ideas and to be able to get the weathering right I searched the web for pictures of old cemeteries. Among other things, I ran into this website, Spyderwood.com, that has a collection of photos from a number of Brittish and American cemeteries. As far as I understand, the site is mainly about crafting various Halloween props. The author has collected the graveyard pictures for inspiration. 


*   *   *


Wednesday 18 March 2015

LXXXII. The Cemetery Project vol.2

When seeking visual reference and inspiration for this project, besides searching the web for photographs and artwork I also took a stroll through Diablo III. The game is rich with fine-looking environments, and it's a great source for terrain ideas. There are two places I wished to visit this time: Cemetery of the Forsaken near Tristram and the vast and urban Briarthorn Cemetery in Westmarch. My Barbarian took selfies in breaks between fighting throngs of violent undead, so you will find some Diablo III screenshots illustrating this post. 


*   *   *

 Urns and Planters


I found ready-made miniature planters, urns and jars in online stores of various companies. But I was a bit put off by their price. It's not that the items themselves are that expensive, but when one adds the price of shipping to Croatia the total becomes too much for that sort of thing. This is why I started thinking about a way to save money through cunning improvisation. I came up with a plan pretty quickly, and the very next day I hit a local arts&crafts shop to buy the necessery materials. So, I suppose my being stingy benefits my creativity. Anyway, here's the deal:

URNS


Groups of urns will be scattered across the bases of my graveyard terrain. Among other things, they will help visually blend the plastic Citadel terrain with my own scratch-built pieces. The idea comes straight from Diablo III. I'll show you how I make them.


The required materials: metal rings of small diametre and plastic and wooden beads of suitable size and shape. I found all these in a local arts&crafts shop. If you don't have one of those nearby, ebay is a good place to find the stuff. It's all cheap- each of those packets cost me around a dollar.
The beads. It is good to have a variety of shapes and sizes. The smaller ones here are 10mm tall, and the bigger ones about a 1/2 of an inch.

To make a rim around the mouth of an urn, just superglue a ring into place. The smaller ones I have look just fine even without a rim.

To blend the rings and the beads together, as well as to provide texture, coat them with Liquid Green Stuff. Depending on the kind of beads you start with, it might also be necessary to do a bit of non-liquid greenstuffing.

Finished, speed-painted urns.

Briarthorn Cemetery (Act V)

Crypt of the Skeleton King (Act I)

PLANTERS


Planters, too, suggested themselves as a nice detail to add while I was whirlwinding throught swarms of zombies. I've come up with two ways to create them - one very simple and the other more advanced.
 
Cemetery of the Forsaken (Act I)
The easy planters:
Some sort of plastic jewellery elements I found while browsing an arts and crafts shop. One can run into all sorts of things...

This was a no-brainer: I just glued the bits together. The trickier part of the process was finding the right materials to work with. These aren't that big, standing about 10-11mm tall.

I filled the soon-to-be miniature planters with sand and coated them with Liquid Green Stuff.

And this is how they look when painted. When adding them to my terrain I will probably put them on some sort of pedestals.

And the complicated ones:

These started as a single metal bell, with its knocker removed. I added rings to the sides for decoration, and then made a mould with Oyumaru so I can make plaster copies. The copies need to be hollowed out using a sculpting tool or a rotary tool (best done while the plaster is ready to get out of the mould but is still a bit wet). Then you can let them dry fully, fill them with sand and paint them. 

*   *   *

Iron Fence


Briarthorn Cemetery (Act V)

I've done the preparation on the Garden of Morr iron fence.

One of the four iron fence pieces from the GoM set. I was worried that the skulls on and between spikes would be difficult to remove without mutilating the fence too much in the process. 

Luckily, I was wrong. After ten minutes of careful cuttting with my hobby knife I ended up with a very much skull-less fence. And the damage was minimal.

The holes left by the skulls were then filled with bits of plasticard, which was first cut to size and then carefully glued into place. Tweezers come in real handy for this kind of work.

Good as new. I did this to all four iron fence sections, and now they are ready for painting.

*   *   *

Mausoleums


Cemetery of the Forsaken (Act I)


Basically, I have cleaned them up and prepared them for painting.

Mausoleum I. The four little club-shaped niches were emptied of skulls and candles and filled 2/3 of the way with plaster. I filled visible gaps with green stuff. And in total, I got rid of twenty skulls and eight twin-tailed comets. The tools used for this were a rotary tool, a hobby knife and a file. 

Mausoleum II.

Mausoleum III.

Thursday 12 March 2015

LXXXI. The Cemetery Project vol.1


I'm about to start an extensive terrain project. The goal is to build a collection of graveyard-themed terrain – walls, fence, tombstones and so on, to choose from when setting up a cemetery board for my games. I haven’t set a deadline, but I expect I’ll be working on this for the next few months. I’m planning to eventually do the same for each of the different environments I wrote about in my last post.


I recently bought a used Garden of Morr set, assembled and cleaned up (more or less) by its previous owner. However, it will require a lot of work to look proper- from filling gaps to getting rid of all those annoying skulls. Yes, it is a graveyard and all, and I’ve seen catacombs and charnel houses we have in the real world that are covered in way more bones than this, but that doesn’t make GW’s design any less tacky. The Citadel set will be combined with some scratch-built stuff.

I’ve done a bit of shopping for other materials I’ll need before I start.
 I have a general idea of what I want to do, so let me just describe the plan in brief.

*


Three musoleums. These came in the Garden of Morr set, and for starters need some gap filling and minor de-skulling. The graves sculpted on their bases will probably need to go, and I’ll add my own details, such as vases and urns. All in all, I think these are the best part of the Garden of Morr set. 

*  


 Walls, fence and gate. Way too many skulls here, and some of those spikes will go as well.  I am also planning to make some walls of my own from scratch. And when I wish to represent a rural graveyard I can use the wooden fence I already have.


Monument. The skulls in the floor should be covered up. The grim statue will probably require some minor conversion. And I will definitely make more similar pieces – crucifixes and small shrines that can stand in the graveyard or by the field or on the crossroads.


Tombstones. Can’t have a cemetery without those. I haven’t bought any yet, but I think the plastic grave markers from Renedra will do very well. I can combine them with wooden crosses made from scratch. These will be based in a combination of different ways- some in groups as area terrain, some in straight rows and some as single graves.

*  


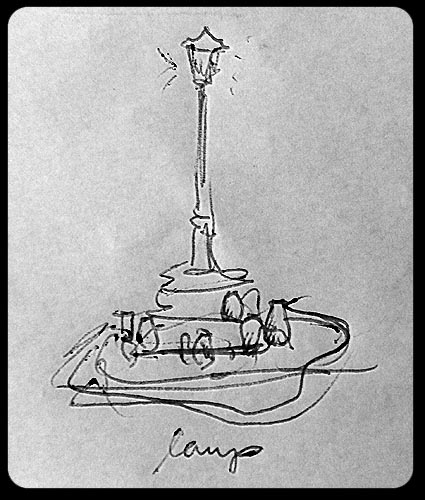
Assorted flavour terrain: lamp posts, coffins, plague pit, stunted trees...  

*  
And there are a couple pieces I already made ages ago which fit the graveyard theme. There is the old cemetery (I'll put some more work into this to make it prettier) and the chapel (still looking good; perhaps it could use a rebasing). I’ll also need a full-size church, but that will be a separate little project in the future.

 
I will definitely get more into detail as I go along. The entire build and painting will be documented and published here in a series of tutorials so it can be useful for everyone. I’m looking forward to working on this.

*   *   *

In the end, a few lines of random fluff. This time it's about the Fair Folk:


Fairy taint is the name for the harmful radiation  that emanates from all Fae creatures. The intensity of radiation varies from one fairy to another, and even a single one will not radiate equally at all times. The taint lingers behind them wherever they go, and remains in any living thing they encounter. The contamination will, however, diminish by itself with time (depending on the dose absorbed).  Prolongued exposure to the Fae causes fairy taint to build up in the body. Smaller doses may cause nausea, tremor or light-headedness.  If a sufficiently large dose is accumulated it usually has damaging effects. A heavily tainted person or animal will eventually display some or all of the following symptoms:

  • Loss of appetite 
  • Weariness 
  • Insomnia
  • Unusual aversion to iron 
  • Social withdrawal
  • Lethargy
  • Hallucinations (such as hearing voices)
  • Disorganized thinking and speech 
  • Infantility
  • Catatonia
  • Amnesia 
  • Glowing eyes, pale complexion
  • Low body temperature
  • Enfatuation with Fae creatures
  • Thin bluish smoke coming out of orifices, often paired with fits of cough
  • Blindness 
  • Undying urge to get up and walk deep into the woods or to throw oneself into a well
  • Obedience to the higher Fae
  • Death
Iron absorbs and neutralizes fairy taint, and repels the Fae by causing them discomfort. This is the reason why village folk will customarily nail an old horseshoe above the door of their cottage.