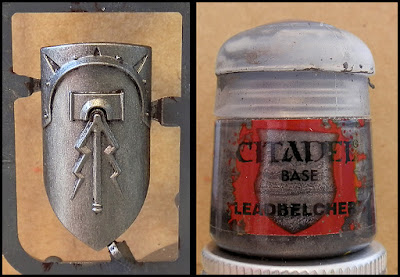
By popular demand, I prepared a step-by-step of how I painted the rusted armour on my Shadespire Stormcast pair from earlier. I'll demonstrate it on a spare Liberator shield.
I. Starting from a dark undercoat, the whole thing is basecoated with a darker steel colour. I used Citadel's Leadbelcher.
II. This is then shaded with Agrax Earthshade, a dark brown matte wash.
III. Using Typhus Corrosion and water to help blend it, slight texture is added. This is done in layers and selectively, with highest concentration in the least exposed areas where moisture would be retained the longest and where it is least likely for the layer of corrosion to be polished off. Typhus Corrosion is of consistency similar to a wash, but with more pigment and tiny granules that add texture to the paint.
IV. Then the colouring of rust begins, first with Secret Weapon Red Rust. This line of weathering acrylics is easy to use and has a very matte, powdery finish. I always apply them in several watered-down coats to have better control over the intensity. Only as a finishing touch, where I want really strong rust, I use the paint straight out of the pot. A thing I noticed with these, though, is that they are always a bit darker when they dry, so keep that in mind.
V. Orange Rust, also from Secret Weapon. The principle is the same as with the previous step. Layers are added until it feels like there is enough.
VI. Going back to the metallic base, edges of plates and details are picked out with a small brush. On larger flat areas, such as a breastplate or here on the front of the shield, light stippling with Leadbelcher can be used to add depth.
To finish it off, I would certainly recommend blacklining between the individual armour plates to separate them. On this shield, this wasn't really necessary, but I wanted to include this step in the demo.I often see people painting heavily weathered models in full plate without this step, and usually they end up looking like old statues. It just looks off, like the plates are fused. They would overlap, and move with the body, so there would be no unbroken rust deposits exactly where the plates meet in that particular pose in which the character was captured...
That is all for now. Severin Steelheart is in the works and should be joining his mates by next week.


Fantastic, it's very clear , simple and effective. Thanks for taking the time !
ReplyDeleteGreat tutorial. Thanks for putting it together!
ReplyDeleteGreat, thanks a lot! Now to buy some secret weapon paints.
ReplyDeleteIf you are UK based Element Games sells them but due to the importing shipping etc they are rather pricey over here at about £5 a bottle, but having said that they are lovely highly pigmented paints and still worth it IMO.
DeleteAwesome! Thanks so much for this Ana!
ReplyDeleteGreat tutorial,thanks!
ReplyDeleteGreat tut. lady!
ReplyDeleteExcellent! I've been trying to figure out how to get a rusty finish that I was satisfied with, and it looks like those Secret Weapon washes are exactly what I've been needing. Thanks!
ReplyDeleteNice work, and a real treat to get some insight into your color processes.
ReplyDeleteLovely tutorial :)
ReplyDeleteThanks so much!
ReplyDeleteUseful; thanks!
ReplyDeleteGreat tutorial, thanks for sharing
ReplyDeleteThanks everyone!
ReplyDeleteI've not been at all interested in playing Shadespire, or Stormcast Eternals, until seeing your work. It's simply beautiful.
ReplyDeleteThank you!
DeleteI love this blog ... plz give us more !!!
ReplyDeleteAwesome work. I'm definitely using this for a project I have in mind.
ReplyDeleteIt was really a helpful post for me. Thanks
ReplyDeleteThis is VERY helpful!
ReplyDelete