I'm planning to DM a mini-campaign later this year set in my Gardens of Hecate world. Titled
Monstrous Births, it will consist of three or four linked games, with the player taking control of the Countess and her spirit host. I have the key points planned out. It will take place in the woods, so I'm all set as far as scenery is concerned. But I do need to craft brand new characters/monsters for the Countess to fight. There is one that I won't reveal until the final game is played. The rest will be featured here as I make them. Today I present the first handful of them:
 |
| Wolf herdsmen are hermits who live in the woods. Wolves gather around them and obey them.
They can transform themselves and others into wolves using a magic
hoop. Many of them were originally monks who secluded themselves in the forest as a
part of their penance or in order to meditate, and mysteriously went feral in the process. They shun the company of fellow man. |
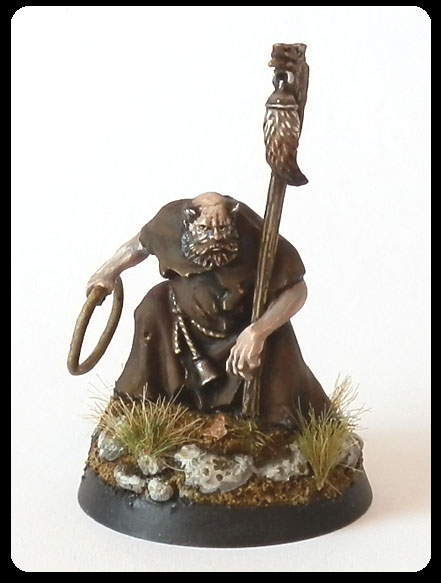 |
| I tried to give him the same yellow eyes the wolves have, but I fear it's not really visible due to his eyes being very small. |
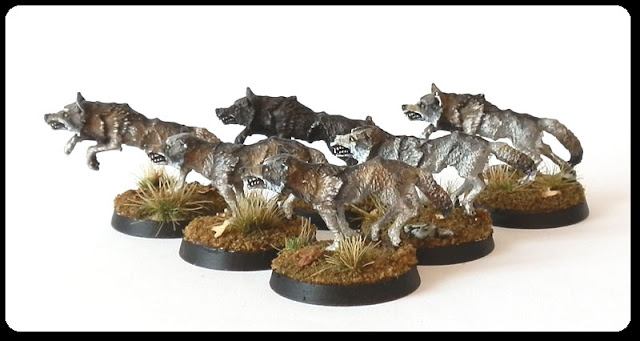 |
| The pack was painted using mostly washes and glazes on top of a white undercoat. I looked at photographs of the real life animals and tried to imitate the colour patterns on their fur. There are only two poses among the six, but I think I managed to avoid the clone look. These minis can double as wolves for Frostgrave, which is great. |
Inspiration
The idea for this came once more from folklore. In northern Croatia and neighbouring Slovenia, vučji pastir/volčji pastir is a person who is the master of all wolves in an area. He appears as an old man in rags or in the shape of a wolf. He organises pack gatherings where he assigns each wolf his prey for the upcoming season. Vučji pastir can transform into a wolf by jumping through a hoop or by rolling on the ground. Legends usually speak of poachers or shepherds who eavesdrop on a pack gathering from on top a tree, which ends in them getting spotted and transformed into a wolf for a number of years as punishment. Similar figures exist in folklore of many other European peoples, Slavic and otherwise.
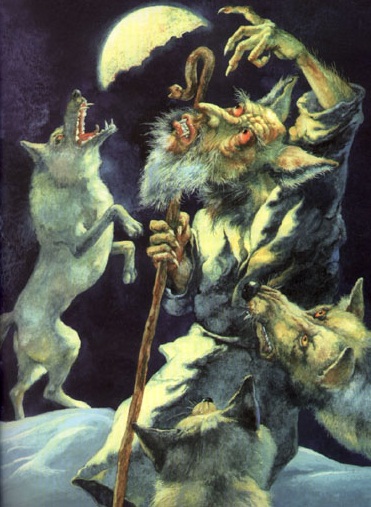 |
| Wolf herdsman artwork by Bulgarian artist Виктор Паунов (Viktor Paunov). |
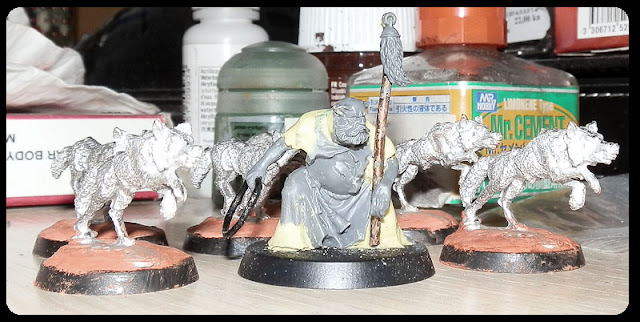 |
| The wolf herdsman has the body of a Skaven Plague Priest from the Plague Furnace kit, head and wolf tail decoration from a Space Wolf, arms from The Hobbit Goblins, carved head on the tip of his staff is from some dwarf's helmet (originally a dragon head, I believe). The staff's shaft is a length of brass rod. The six wolf miniatures are Young wolves from Ral Partha. |
Design choices
At
first I meant to dress the character in dirty and torn civilian
clothes, but he ended up in a frayed monk's habit when I discovered that
Skaven body in my bits box. He needed to have a bushy beard, so I
picked this Space Wolf head. It also sports a hairstyle that looks a lot
like the tonsure, which is associated with Catholic monks. The props
that were a must include on the figure are the staff and the hoop. The
staff was meant to be a shepherd's crook, but I went in a different
direction after I decided to add a wolf's tail on it to visually tie him
in with his wolves better. After that I thought I might as well put a
carved wolf head on the top. For the hoop I went with the simplest
possible look.
For variety's sake the pack will in the future be joined by a few more wolves which will be different sculpts.
* * *
Wilderness basing- how I do it
MarK asked me in the comments about my recent basing style and I promised a tutorial. So here it is for all of you.
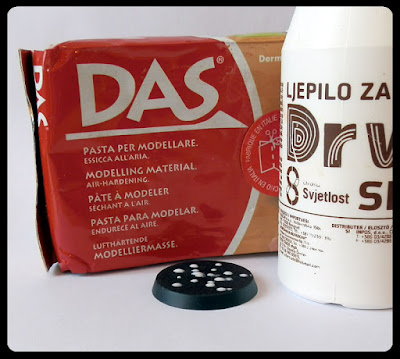 |
| STEP I: If my composition requires it, I first build up some height with DAS clay. When you do this make sure to put some PVA underneath to help it stick to the base. When it cures it should be durable enough (has always been for me). This can also be done with Milliput if you are afraid DAS is not strong enough. |
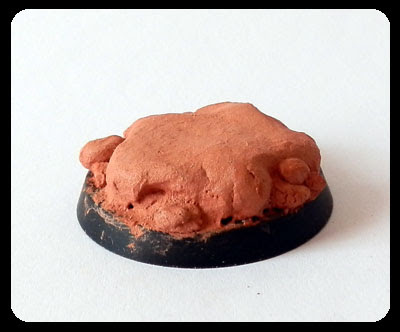 |
| I sculpted a rock for the wolfherd to stand on. DAS comes in white and terracotta. The colour is irrelevant because it gets painted over anyway. |
 |
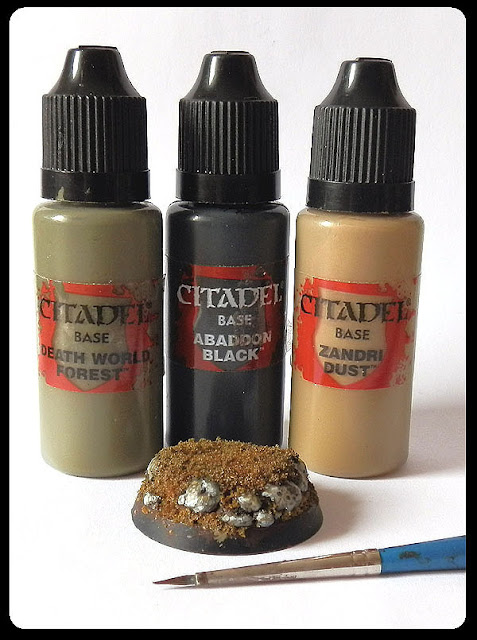
| STEP II: After priming I paint the entire thing dark brown. |
 |
| STEP III: When the paint is dry I cover everyting that won't be a visible rock in PVA and dip it in Noch flockage. |
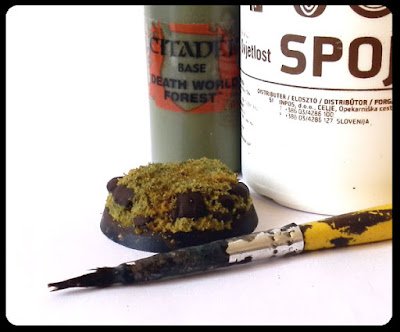 |
| STEP IV: Next step is making a PVA and water mix and covering the flock with it. The flock will soak it in and when it's dry it will become more durable. While this is still wet I take watered down green paint and wash patches of flock that colour. This adds some variation. Or if you have more than one colour of flock you can just use more than one colour in step III and skip the paint. |
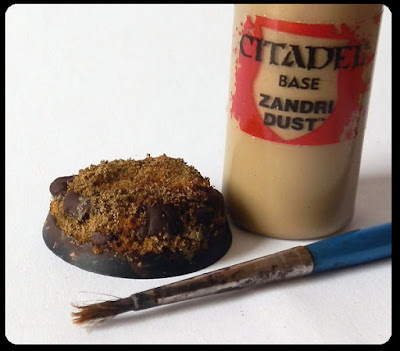 |
| STEP V: When step IV is completely dry I take an old brush and stipple the flocked areas with Zandri Dust. These highlights give the base more depth. |
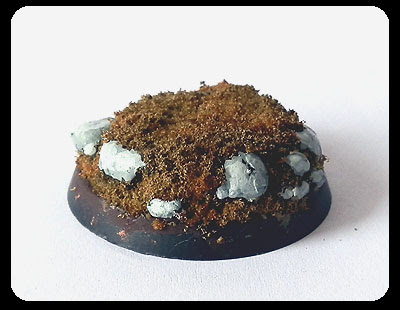 |
| STEP VI: The rocks. Dawnstone layered with Celestra Grey. |
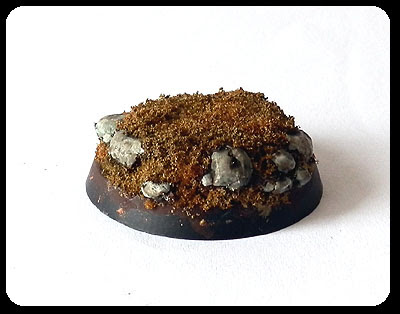 |
| STEP VII: Black wash and brown wash on the rocks. |
 |
| STEP VIII: I add highlights here and there with light grey, almost white. And finally paint specks of moss and lichen. |
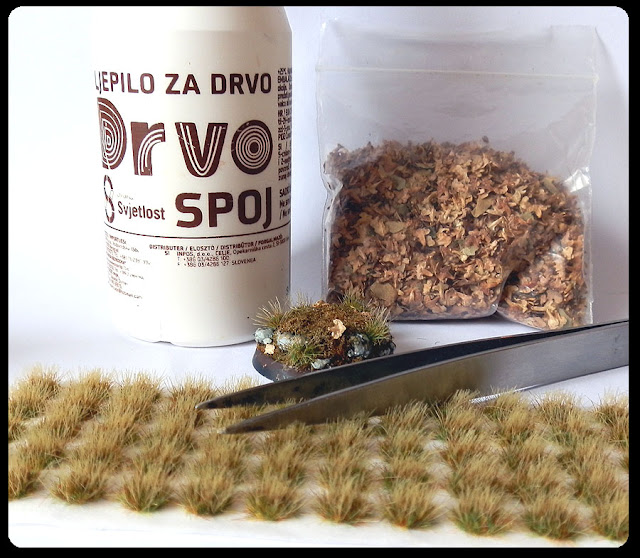 |
| STEP IX: After this I usually finish off with some tufts and leaves. Handled with tweezers and glued with PVA. Just a tip: don't forget that grass tufts can be shaded with washes and highlighted with a brush, too. |
There are tons of basing products out there. One can play around and experiment. Not necessarily use all of it on one base - less is more. This is a part of my current basing arsenal:
- NOCH static grass. Different lengths and shades. I used this a lot on my Wilderness scenery.
- NOCH flock. Versatile stuff. Used in the above tutorial.
- Flowers from Kellerkind Miniaturen.
- Citadel static grass.
- Pablo el Marques static grass. Great thing about this brand, apart from a wide palette of available colours, is that they sell grass in packs as small as two grams. Most convenient.
- Mini dry leaves. Come from birch seed pods. Can be bought or collected from nature.
- Aetztech etched brass ferns.
- Gamer'sGrass tufts. I use them a lot. Variety of colours, tuft sizes and fibre lengths to choose from. There are moss patches and flowers, too.
- Ivy and tree leaves from Mini Natur. There is also a pack of their moss tufts in that pile of blisters.
- Natural tree roots I harvested myself.
All these things are good for bases as well as scenery and dioramas. And there are still many things I want to try out but haven't got round to purchasing yet. What do you guys use for your bases?


